Page 1 of 1
Desks I'm building at work

Posted:
Thu Mar 13, 2014 10:44 pmby J-HALEY
Posted:
Thu Mar 13, 2014 10:47 pmby J-HALEY
Posted:
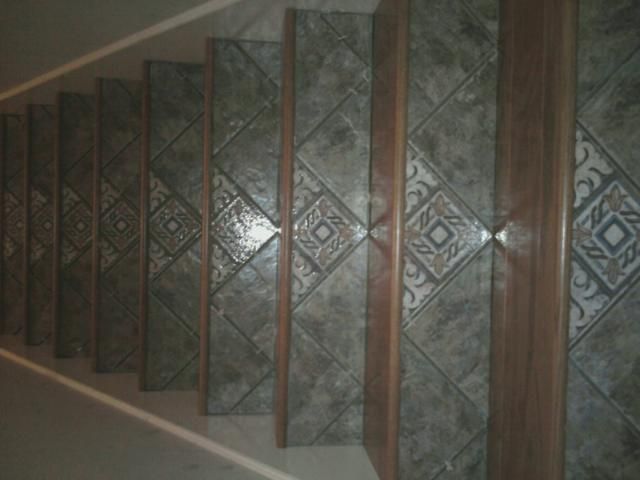
Thu Mar 13, 2014 10:52 pmby J-HALEY
The stairs I tiled and planked in our house.
Posted:
Thu Mar 13, 2014 11:08 pmby gbheil
Nice . . . but are they wood ?
Posted:
Thu Mar 13, 2014 11:37 pmby J-HALEY
I use Paint grade birch as a substrate and that is a Nevemar commercial laminate and looks exactly like African Mahagony. Good eye George! If that light was more natural as in the offices they will be placed in you wouldn't see that glare. It really looks just like wood. In a commercial office that laminate wears way better than actual wood. That podium is solid Cherry though. I do a lot of lab build outs which includes drop ceilings wall construction lab case work, lab counters phenolic and epoxy. I basically build what they ask for. We have an architect, design team. It is a very large variety of carpentry and building maintenance.
Posted:
Fri Mar 14, 2014 9:08 pmby gbheil
I envy your ability and opportunity.
To build with one's own hand is a most rewarding venture.
Posted:
Fri Mar 14, 2014 11:32 pmby J-HALEY
George, in 2005 I did some lab counter tops and sinks at that new hospital in Tyler.
Re: Desks I'm building at work
Posted:
Sat Mar 15, 2014 6:55 pmby Firebird78
Nice J! Could use you around the house if you get bored!!!!
Posted:
Sun Mar 16, 2014 12:56 pmby GuitarMikeB
I need to remake my computer/mixing desk. I'm using a piece of 1/2" plywood that I used as a fold-down table in a studio apartment in 1982!
I don't have the tools to work with those laminate sheets correctly, I'd phuck them all up. I looked at the premade countertops at Lowes and HD yesterday, but they are not dewp enough and too expensive, as well. I can fit an 8-ft long one into place by rearranging and creating storage underneat (and on top on one end), so will probably go wiht a 4x8 sheet of nice grade poplar ($36 at HD right now), stip it down to 30" deep, add a pice of 2x2 on the front and left exposed edges so that the plywood layers aren't exposed. Then I'll stain and urethane the whole top. Spring/summer project I guess.
I've got more bass traps to make, too, as a guy gave me 4 pieces of 3.5" acoustic insulation yesterday.
Posted:
Sun Mar 16, 2014 5:29 pmby J-HALEY
That is the cheapest way out. If I were you I would get popular 2"x2" to match. If you have a router use a nice edge forming bit such as a 1/2" round over bit. Set the depth by testing on a scrap piece until you get the look you want. I like setting those bits just a little past full depth it adds a nice 1/8" reveal above and below the round over. Poplar takes stain very nice too. If you really want to get fancy use some high build poly urethane after staining!
Posted:
Sun Mar 16, 2014 10:21 pmby GuitarMikeB
I do have a router, but I have ZERO talent with it! Afraid I'd take half my thumb off!
Posted:
Sun Mar 16, 2014 11:12 pmby J-HALEY
Mike routers are the easiest of all woodworking tools to use. Just be sure the piece you are working is clamped down securely to a work table and the router base is flat on the work piece then just go left to right. Always take your time and above all don't stick your finger in the bit.
Posted:
Mon Mar 17, 2014 12:40 pmby GuitarMikeB
I've only used the router in a small table mount. Inherited it from my father, the bolts are probably rusted tight to the table!
Posted:
Mon Mar 17, 2014 11:02 pmby Paleopete
Pay attention to that left to right part. Try to cut the wrong way and a router will dig in and run away with you, easy to get hurt.
With the type bit he's talking about, it's dead simple. Make a few practice runs on some scrap wood, to get the feel of it and get the depth set, and the bit has a bearing on the bottom that rides the edge of the wood, it makes a perfect radius, even on plywood. The tough ones to use are the bottom cutting ones I use to do door hinge pockets. Without a jig it's almost impossible to get them nice and neat, and you have to have a very steady hand. Really easy to go crooked even with a good line to follow. But with the round over type Jeff is talking about that's not a problem, the bearing keeps you from digging into the wood.
Just try it on a couple of scrap pieces first, I've used a router for 10 years and still use a scrap piece every time.
Posted:
Mon Mar 17, 2014 11:03 pmby Paleopete
Pay attention to that left to right part. Try to cut the wrong way and a router will dig in and run away with you, easy to get hurt. In machine shop work on a milling machine it's called "climb cutting" and will work if done right but will also dig in bad and break end mills if you take a heavy cut or feed it too hard.
With the type bit he's talking about, it's dead simple. Make a few practice runs on some scrap wood, to get the feel of it and get the depth set, and the bit has a bearing on the bottom that rides the edge of the wood, it makes a perfect radius, even on plywood. The tough ones to use are the bottom cutting ones I use to do door hinge pockets. Without a jig it's almost impossible to get them nice and neat, and you have to have a very steady hand. Really easy to go crooked even with a good line to follow. But with the round over type Jeff is talking about that's not a problem, the bearing keeps you from digging into the wood.
Just try it on a couple of scrap pieces first, I've used a router for 10 years and still use a scrap piece every time.


